
Yarn Ends Stuck: The Secret to Weaving Yarn Ends That Stay PUT!
The Secret to Weaving in Ends
Today I will share with you the secret to Weaving in Yarn ends that stay stuck! At the end of this short post I will share with you a BONUS tip on how to really cement those ends down. Even after you weave them properly.
I am a self taught crocheter. For the longest time I read "Weave in Ends" in all the patterns I was using.
This was really frustrating, because what the heck did that even mean? Most patterns do not go over that little detail because they assume that everyone already knows.
But I did not... for the Longest time I just stuck my yarn into my yarn needle and started stitching all over the place. Weaving here and there and everywhere, to try to get the yarn wound up enough. To keep it really stuck so it wouldn't just pop out again. Only to result in the end popping out every time I stretched or moved the finished project.
Weaving Ends
So I am here to share what took me a long time to learn! How to weave in ends properly. It really shouldn't have taken me so long because its actually very simple and easy. Not to mention there are a lot of resources like this BLOG! So if you happened upon this blog I am excited to help you on your crochet journey. I feel like Weaving in ends can be broken down in to 3 basic steps. But to help even more I have added my final tip as the cherry on top.
The Right Stuff
Before we get to our basic steps, having the right materials to weave in ends properly is really helpful. First lets talk about Plastic Yarn needles... I despise them! They bend and break. They are terrible at poking through tight stitches. I always recommend metal ones!
That being said if you have a plastic one do not fret! The plastic ones are really common in crochet kits for beginners. They do a decent job on really loose crochet stitches. But! This is your sign to upgrade, and treat yourself! You can get metal needle sets for just a couple bucks and they are so worth it. I will link the set I use below, I like this set because its super cheap and has a variety of sizes. Different sizes for different projects can be really helpful.
(this is an affiliate link, I will make a small commission if you use this link at no additional cost)
Step 1 to weave in yarn ends
The first step to Weaving in ends is leaving a long tail for sewing them in. Any time you clip an end off, keep this in mind. If it needs to be weaved in, you want to make sure it is left long enough! But what Is the right Length? It is really hard to Properly weave your ends in if they are super short. You will see why in just a minute. I like to leave around 8-10 inches of yarn when I clip my ends.
Goal
The goal will be to weave the end back and forth so it can't just pull out. We will talk about that more in step 3. Sometimes on a project you will not have enough yarn left to leave an end long. Or maybe you already cut your ends shorter before you knew how to properly weave in ends. Now you are looking for how to fix that, do not worry!
Sometimes it just isn't possible to leave your ends long. And sometimes they are already cut too short. That is where our bonus tip will come in.
Step 2 to weave in yarn ends
It can be really hard to weave in your ends, without them showing, if you weave the ends into stitches that are loose.
This is really a big problem if you are using a more lace style stitch or one that is naturally farther apart. So what ever project you are working on, if you finish in a loose spot you want to try to backtrack. The goal is to get your yarn to a spot where you can do a strong weave.
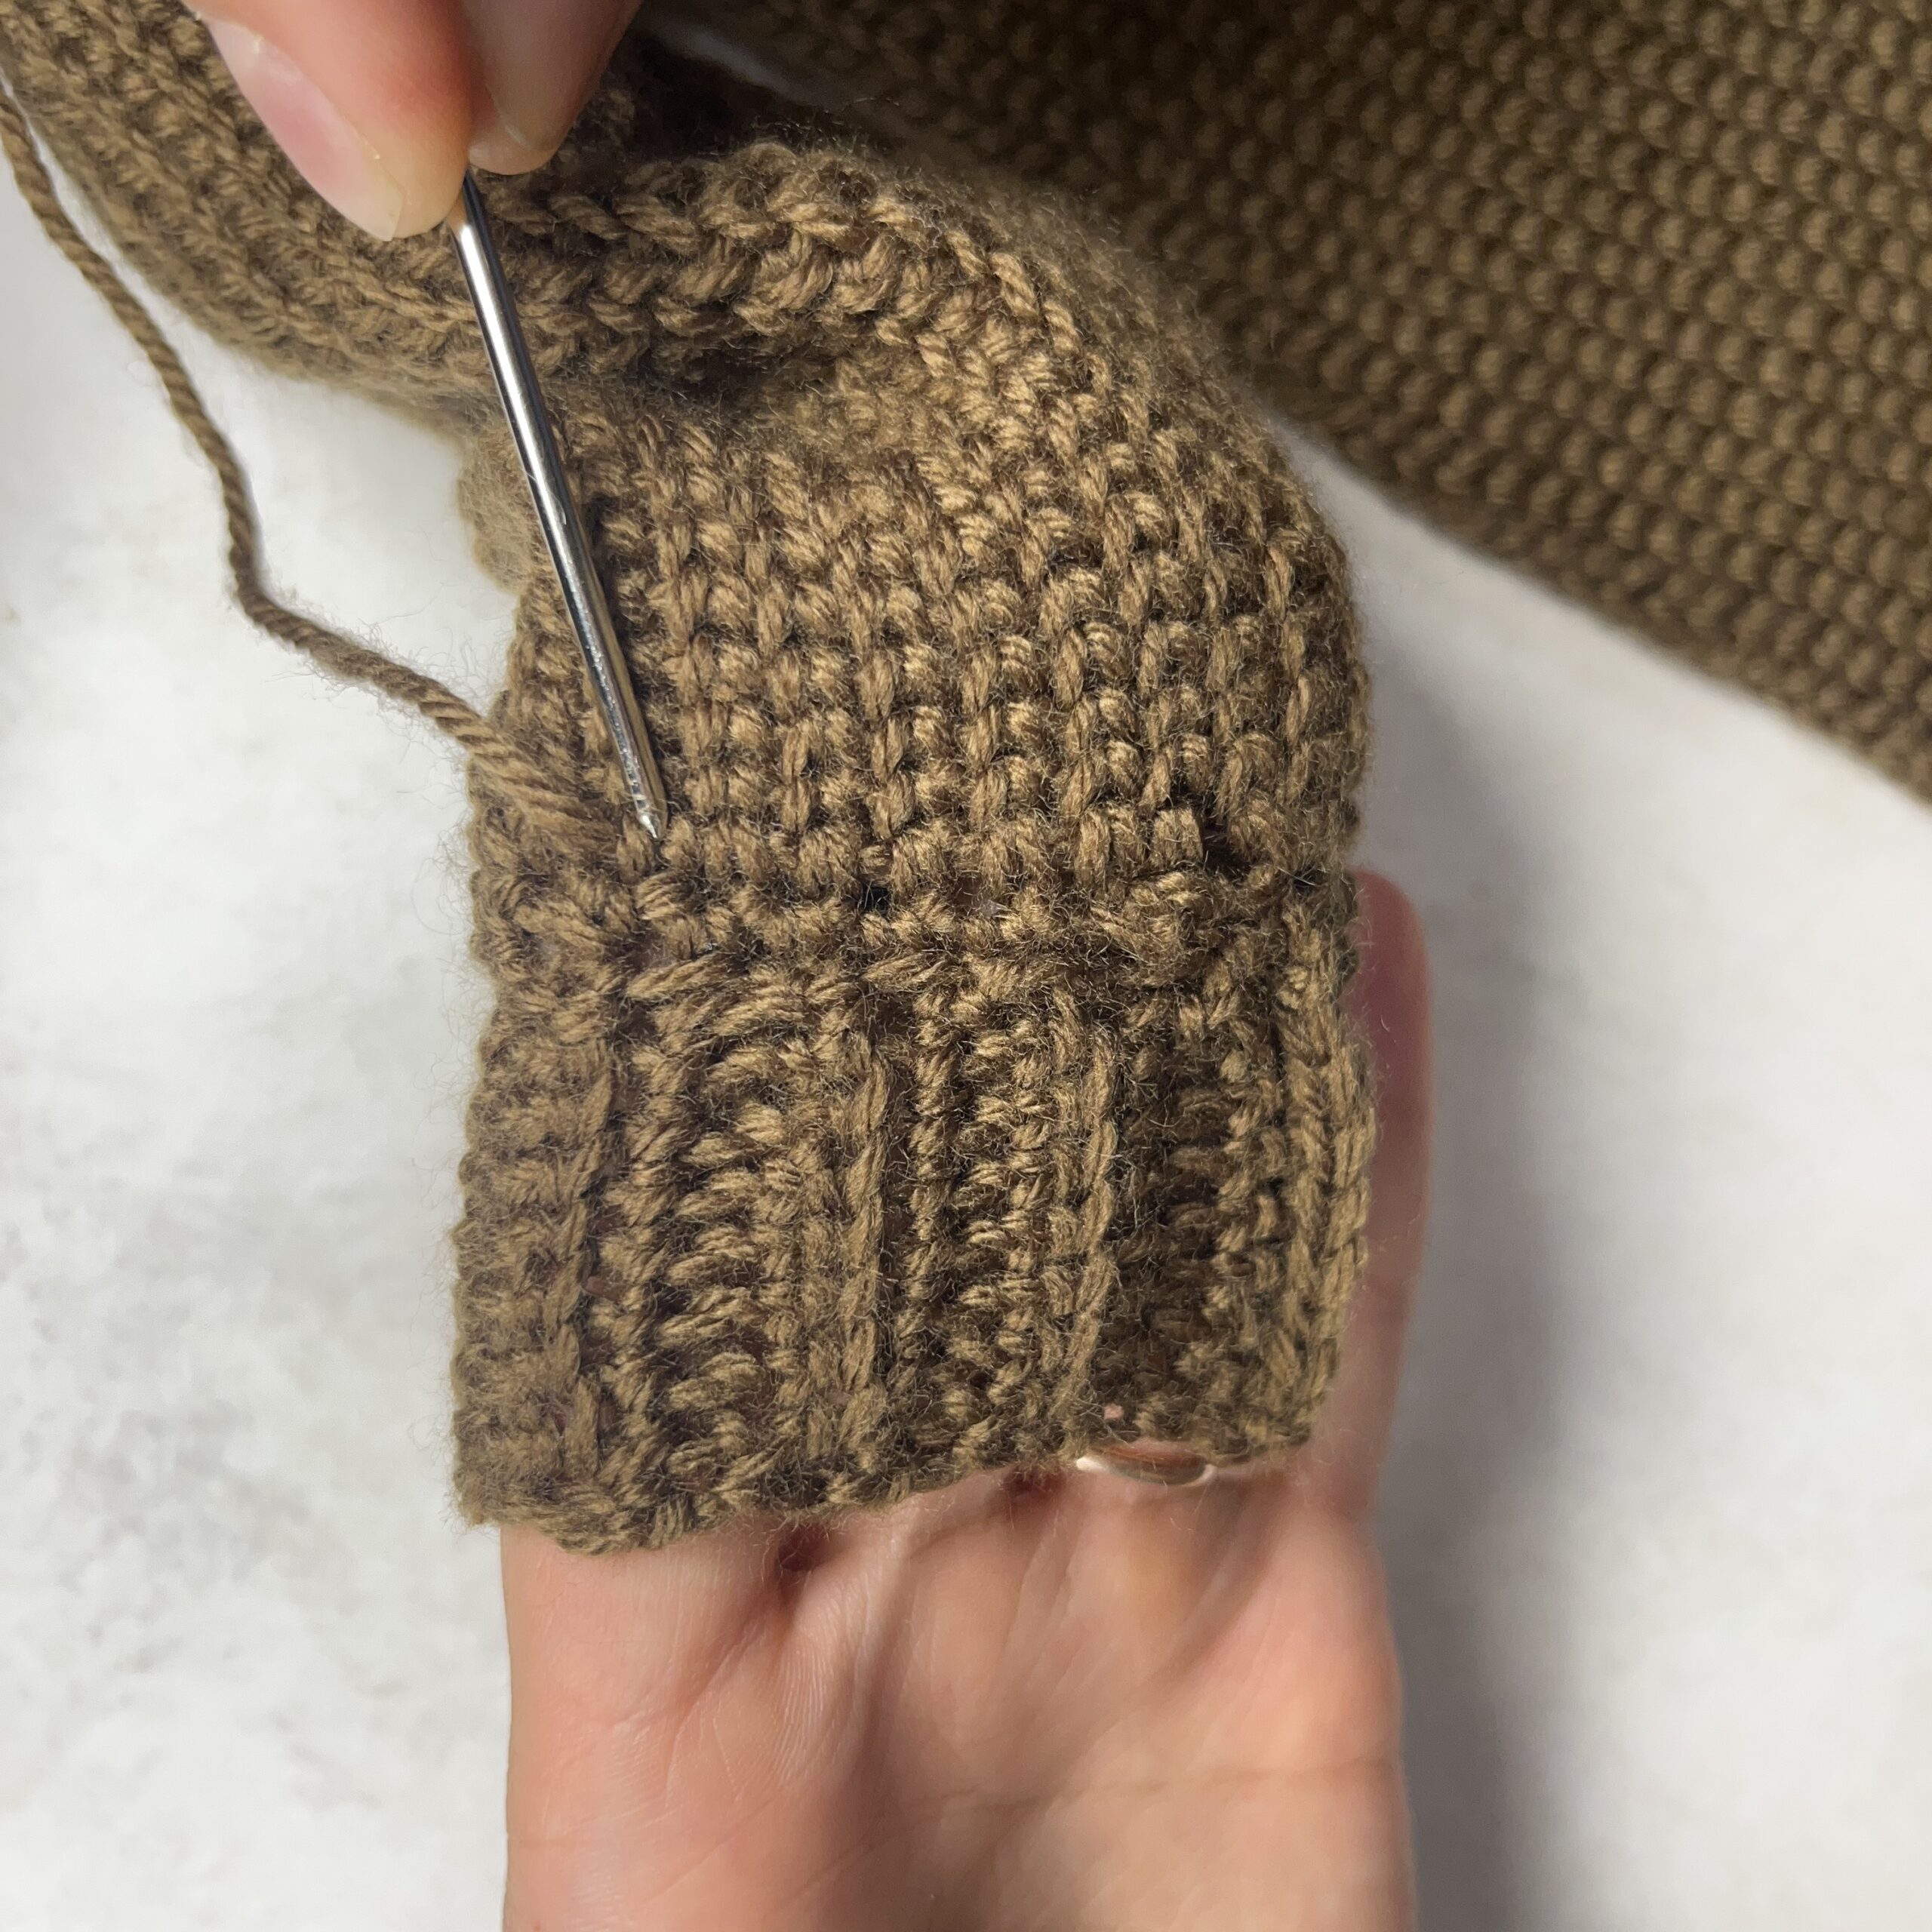
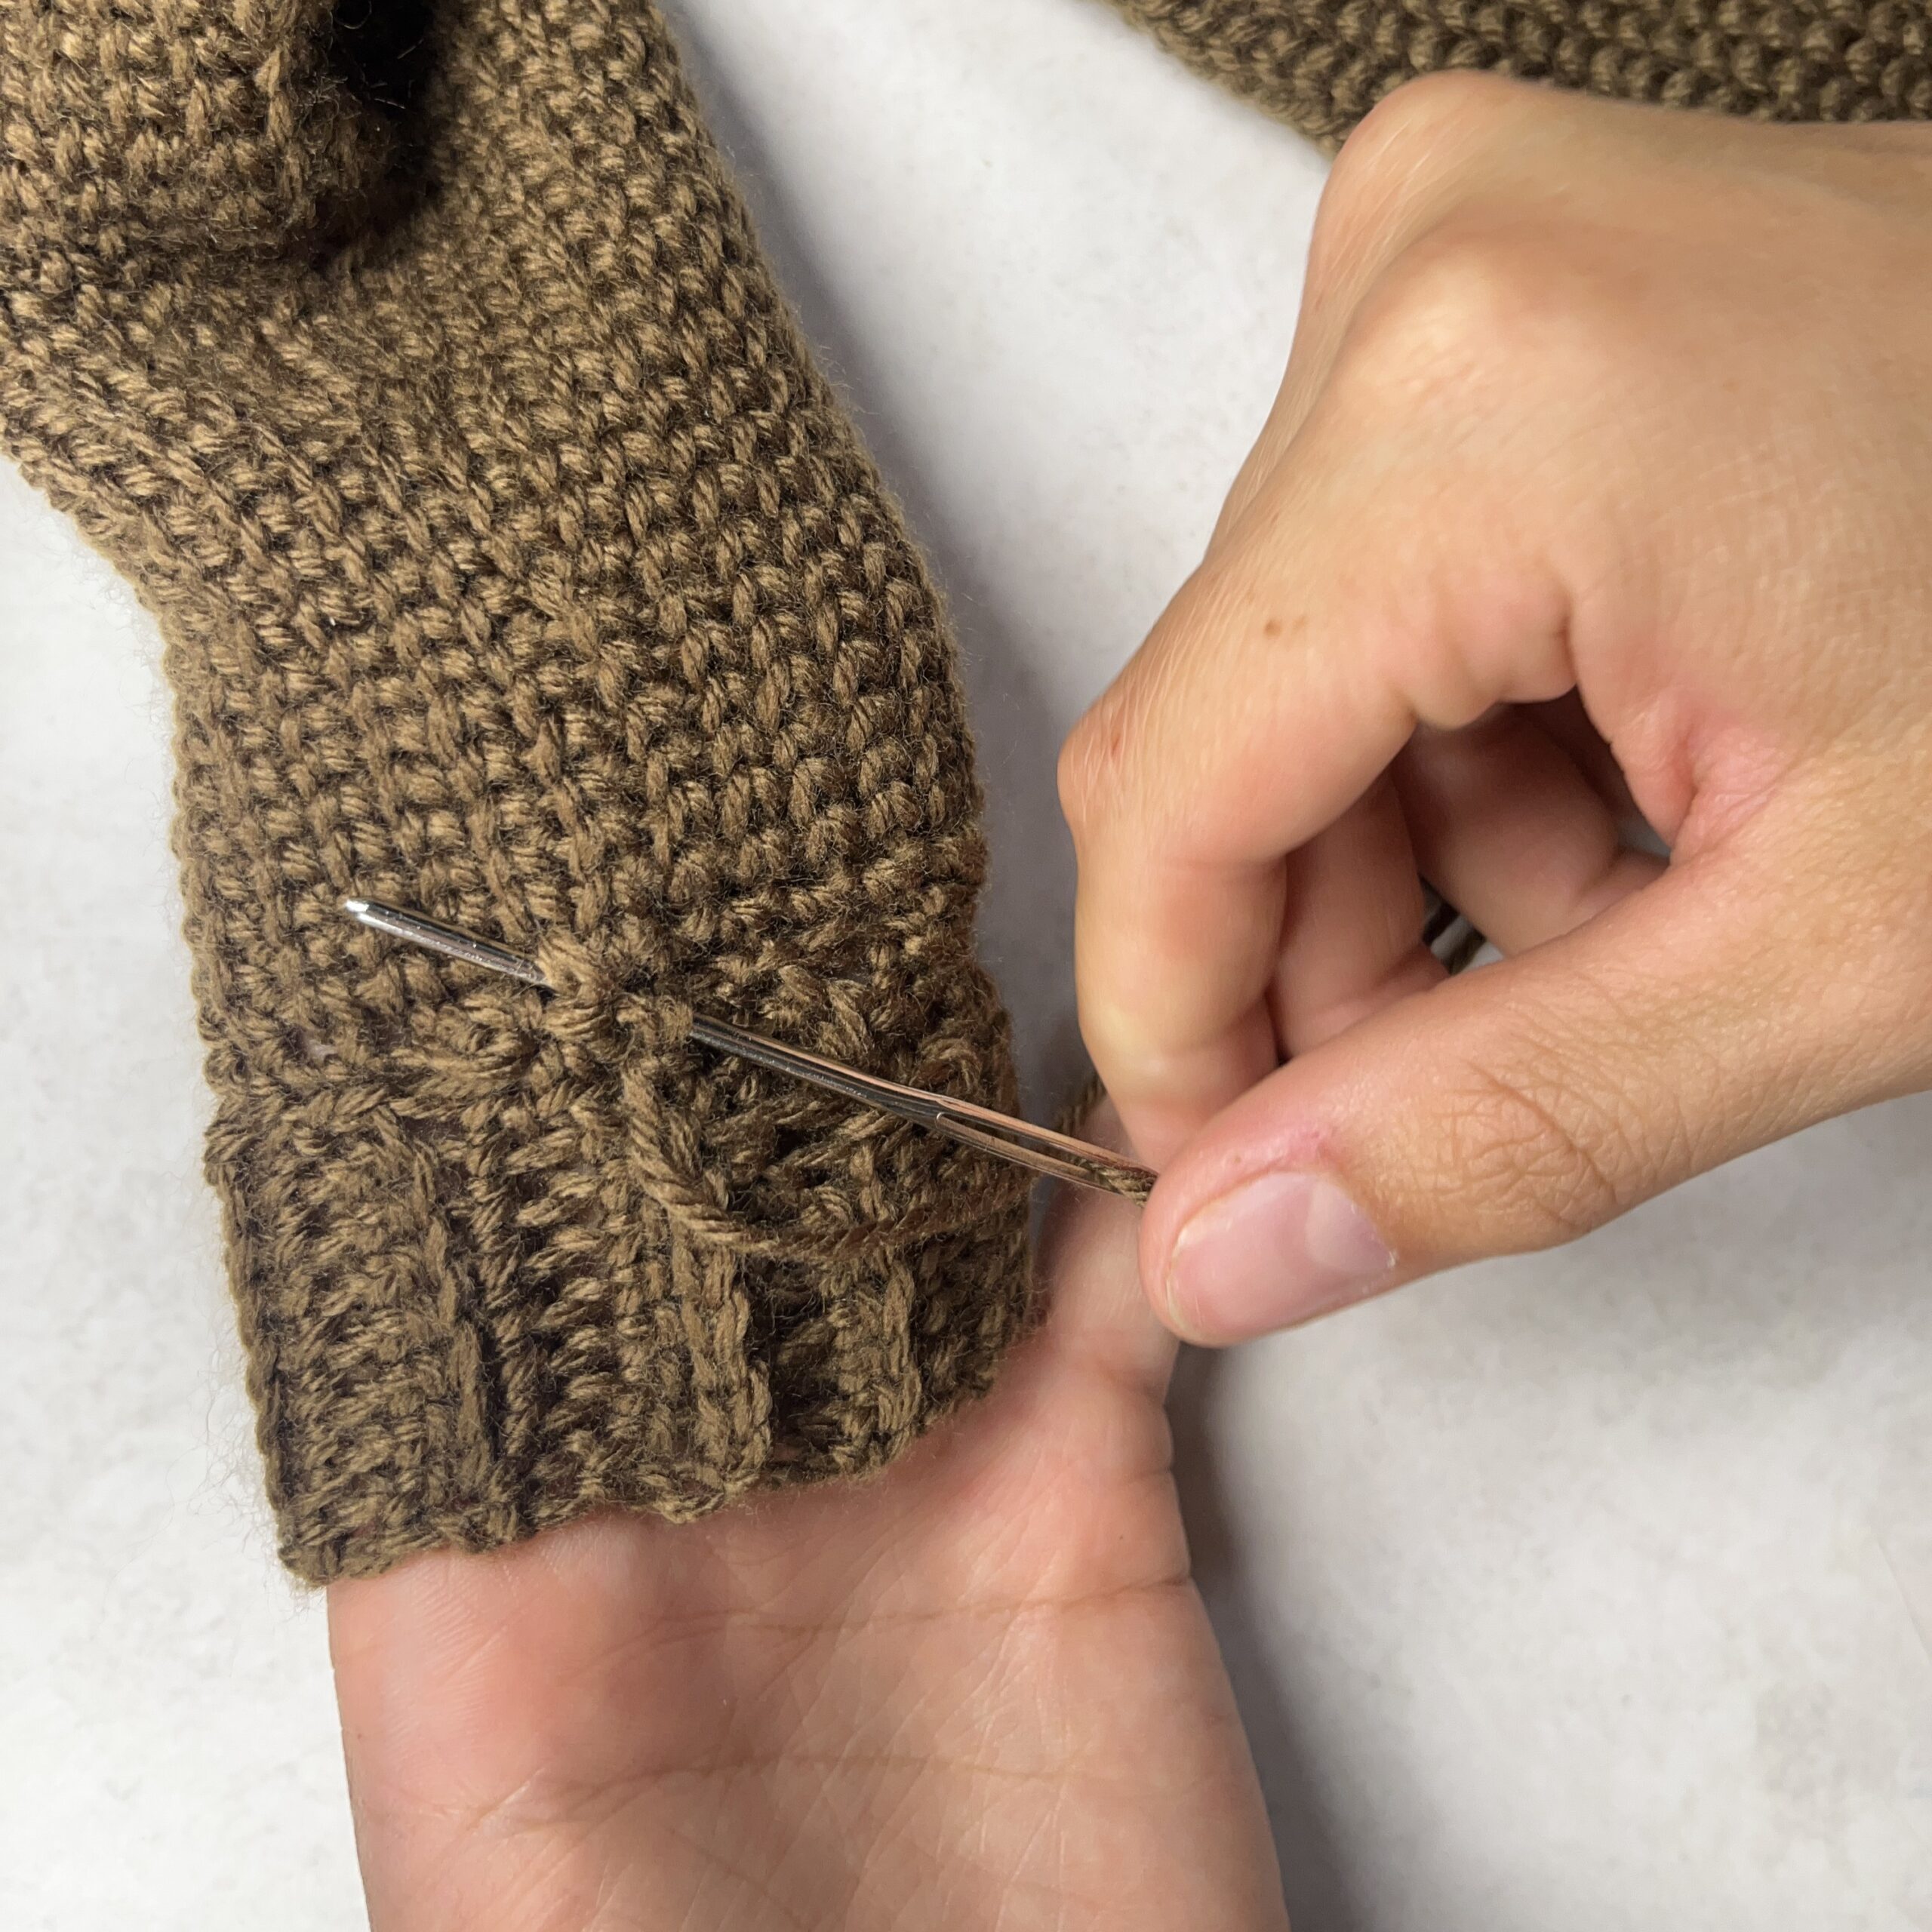
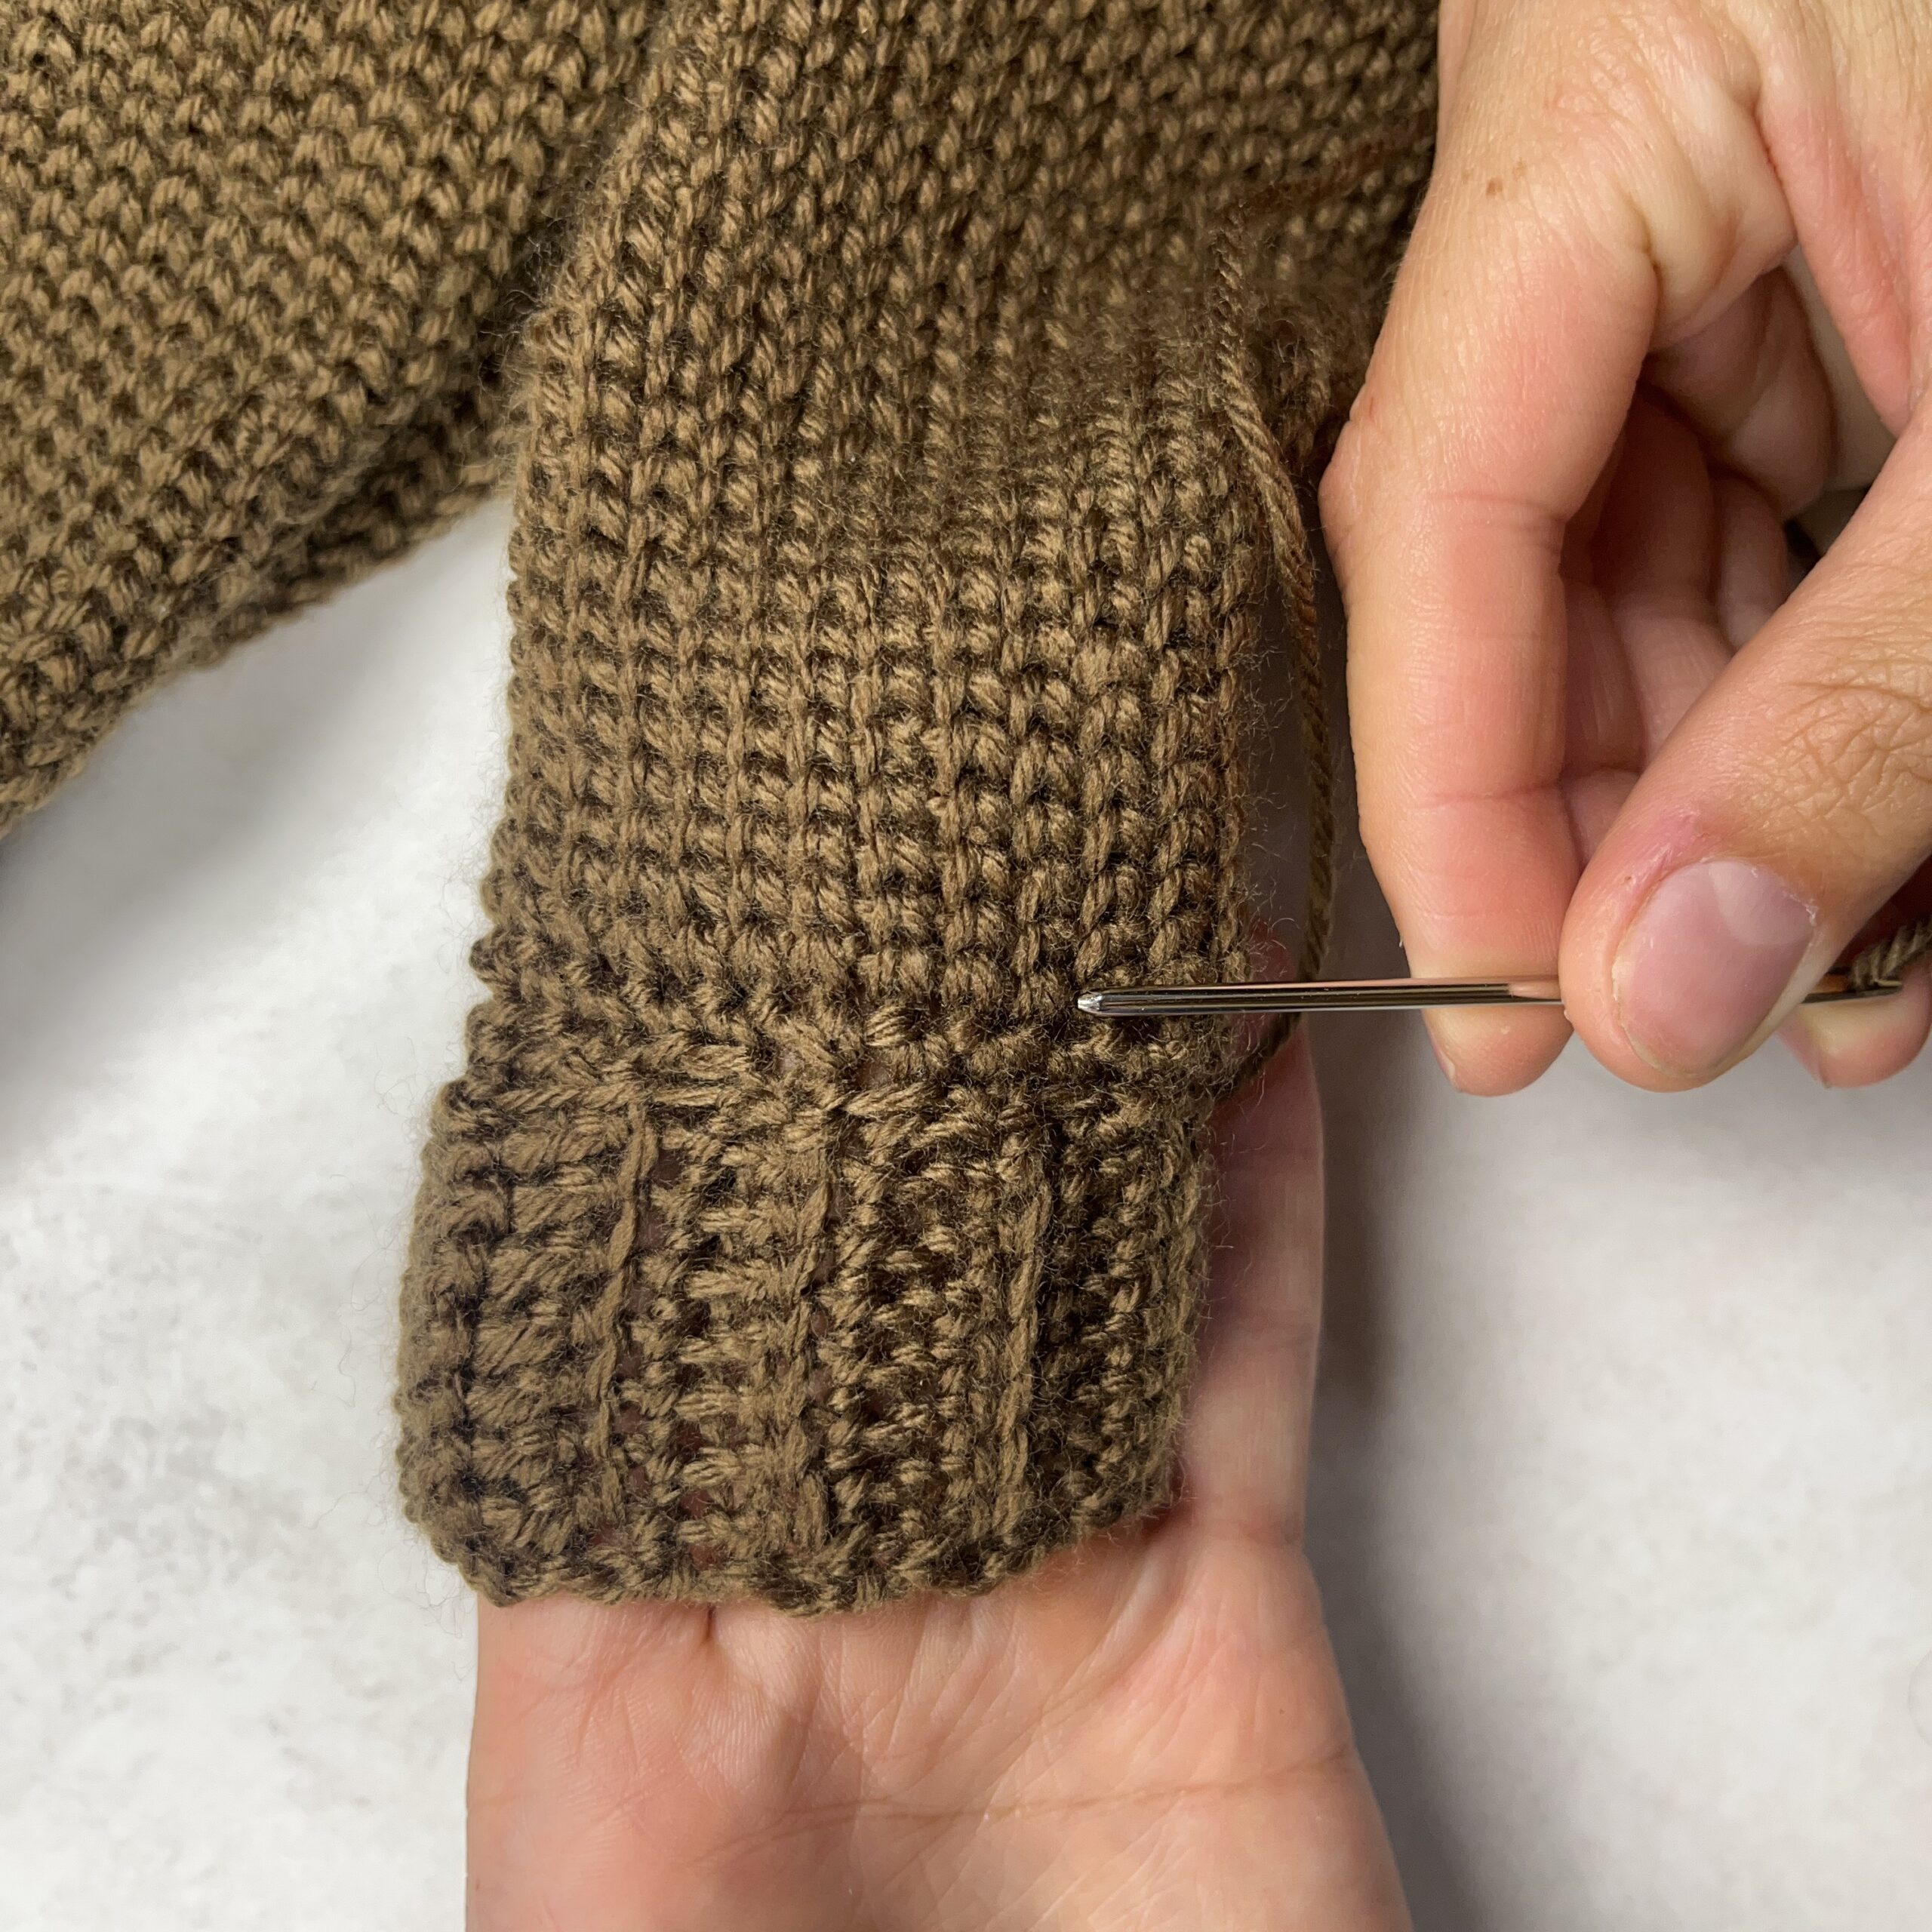
For Example, below you can see a sweater sleeve I was working on. The cuff of the sweater was loose and had stitches that were less concentrated than the sleeve behind it. In this example my Yarn had finished at the end of the cuff. But I wanted to weave my ends into the main sleeve. So how did I get my yarn back to the sleeve? I stitched the yarn into each of my cuff stitches, with my yarn needle, until I made it back to the sleeve.
Step 3 to weave in yarn ends
Now I will show step 3. What we want to do here is weave our yarn ends back and forth inside our rows of stitches. The main key here is to weave in multiple directions. If you run the yarn all in one direction while you are weaving in your ends, any time you pull on the stitches a little, the end will pop out. Then if you clip it, it will pull out again.
This might sound like what I am saying is to run your yarn the the left and right and up and down. All different directions! Right? Not so... let me explain.
Strategy
Running your yarn in a continuous path even in different directions in still running it in the "same direction".
The real goal when you are changing directions is to get the yarn to the point where when you tug on the stitches it really doesn't pull out the Yarn tail you are weaving in.
We aren't trying to get our yarn wrapped as many times as possible the goal is really just to weave the yarn along the inside of a couple inches of stitches so we cant see it. And we want to do this in the same spot in different directions. I will add more photos here to explain this next bit.
How to do it
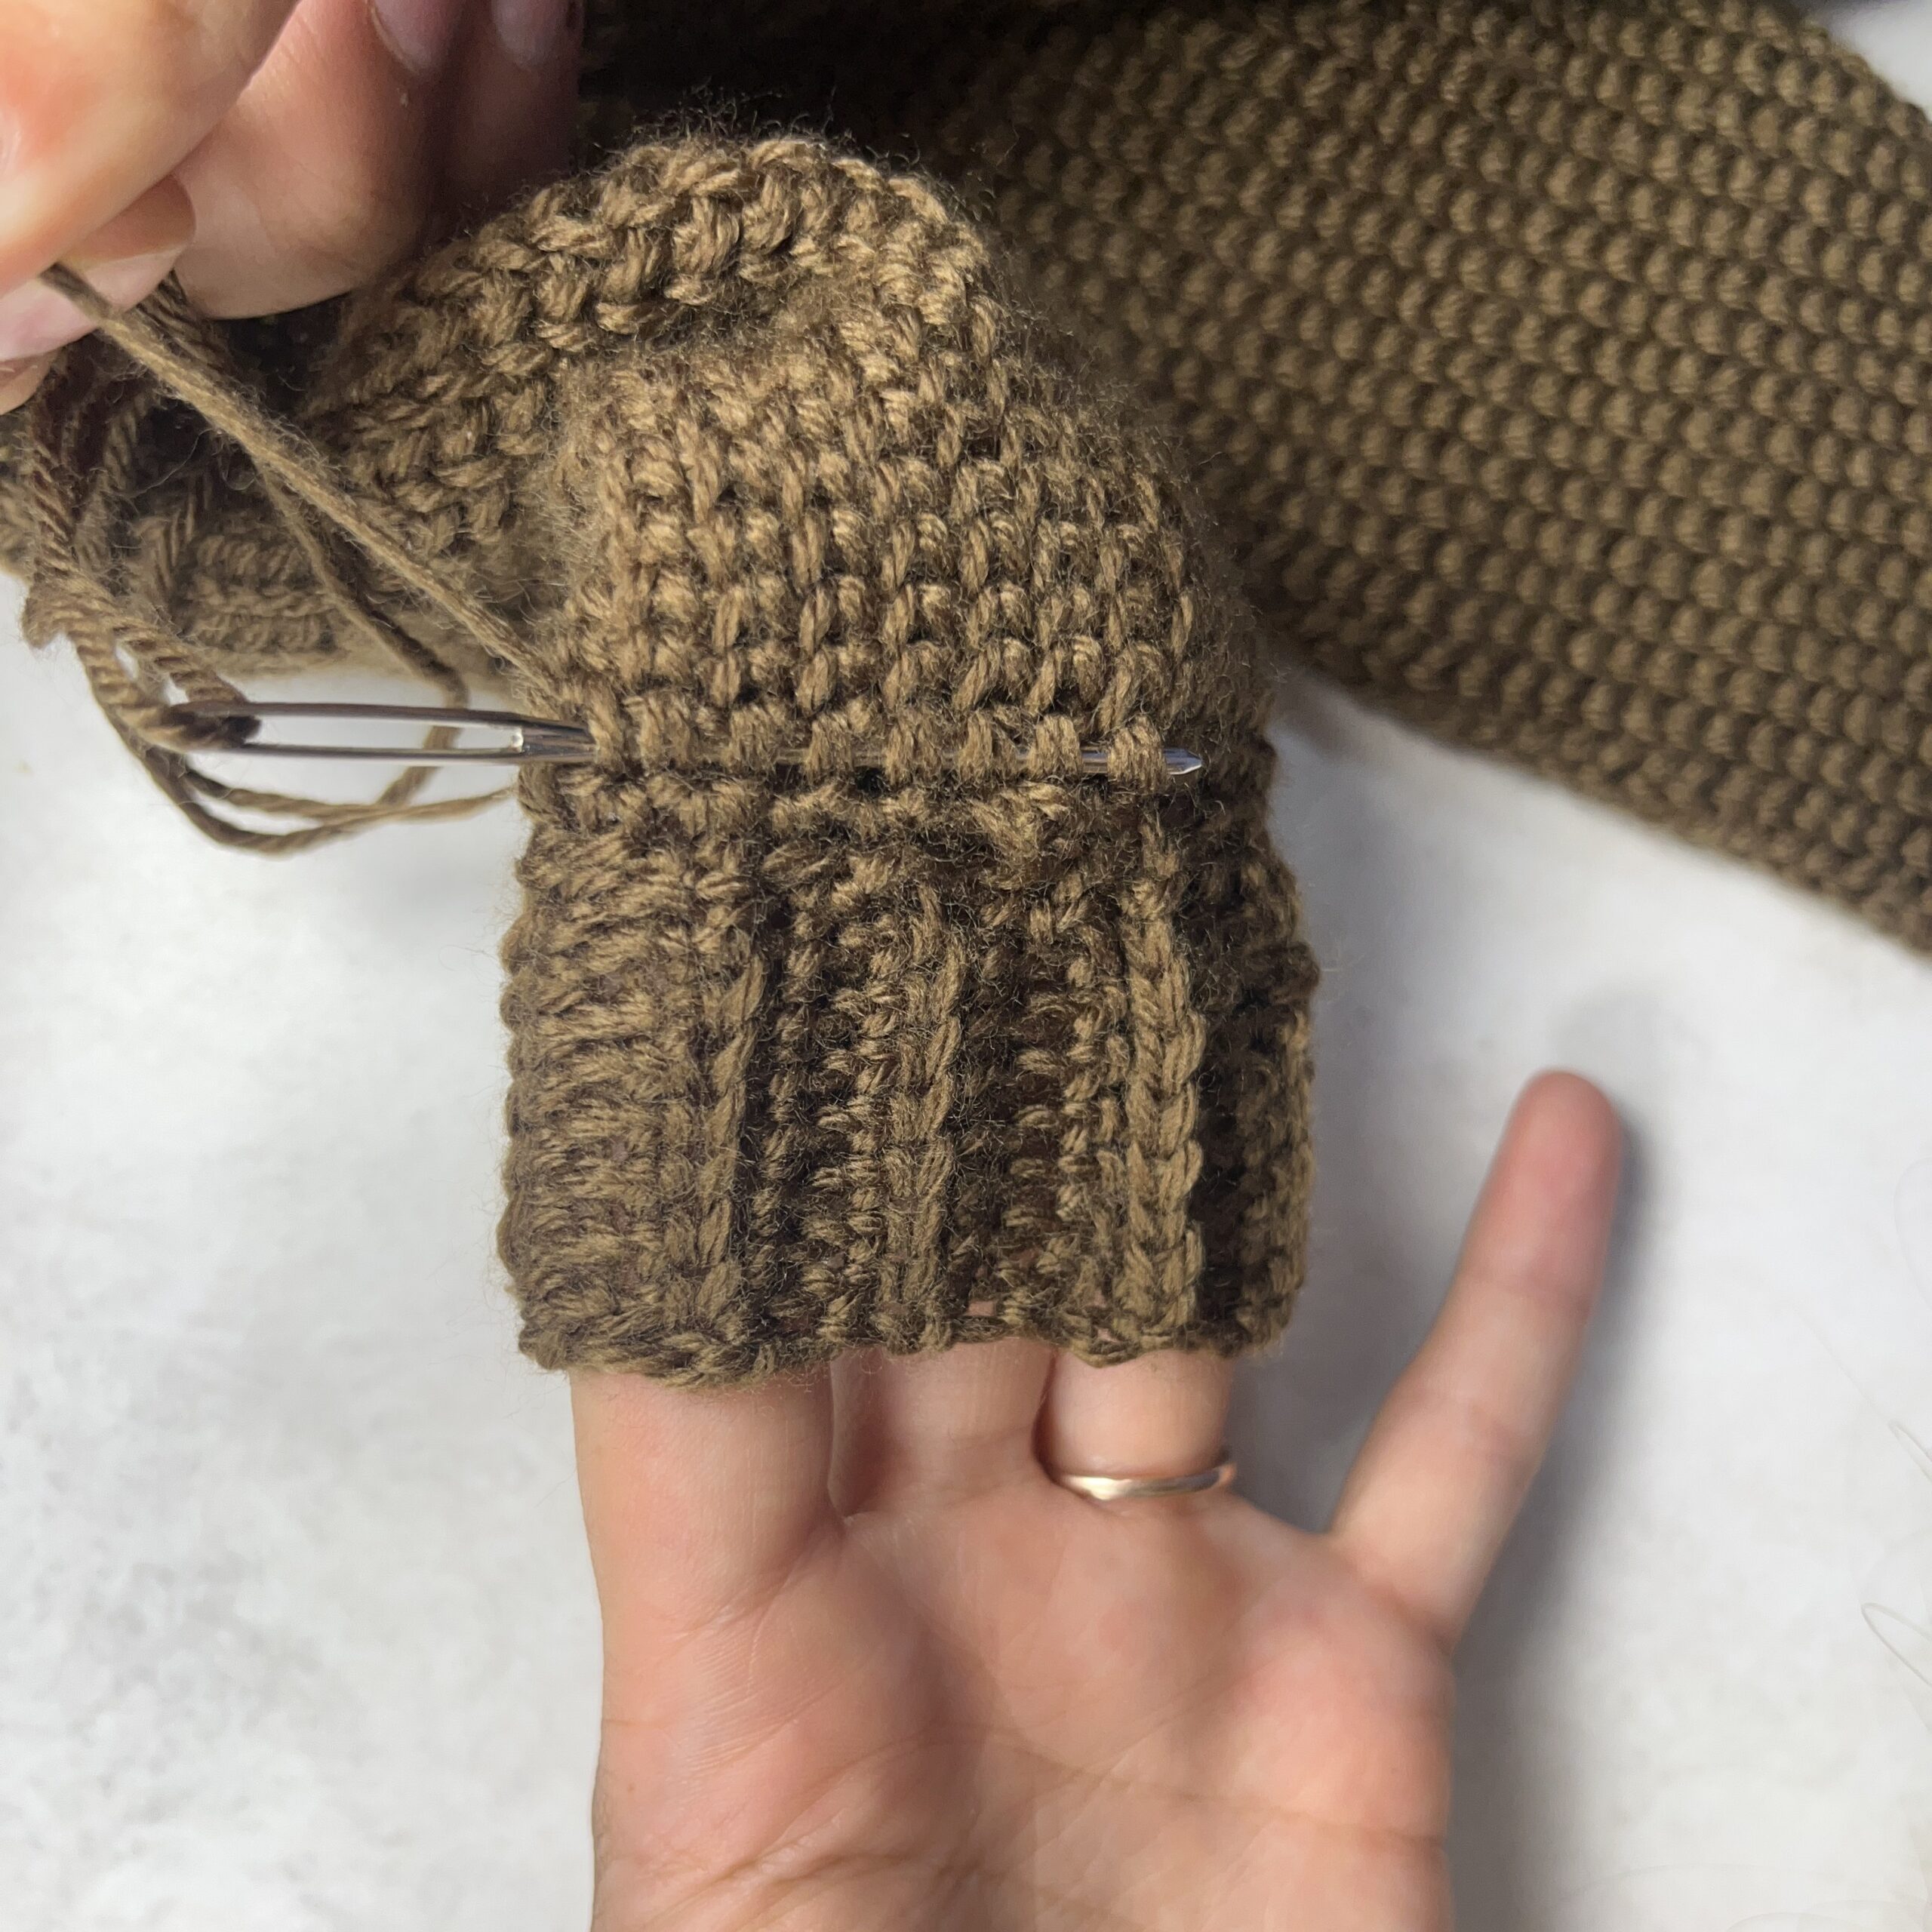
Insert your Yarn Needle into a bunch of stitches in a row. You want the needle to be in the center of the actual stitches. You do not want the needle to be on the inside of your project. Just inside the stitches of your project... hopefully that makes sense. If it doesn't I will link my YouTube tutorial for weaving in ends at the end of the blog.
Now you have pulled your yarn through a few inches of the center of some stitches. We are going to take our yarn and needle and turn it, skip one of the stiches you just wove through. Then run the needle back through all the rest of the stiches you just came through.
The reason we skip that one stitch is so we don't undo what we just did.
We will repeat this process one more time. Turn, skip a stitch, and weave our yarn once more back through those same stitches.
Now that we have gone in 3 different directions inside those stitches, it will be really hard to pull those ends out. They should be nice and strong.
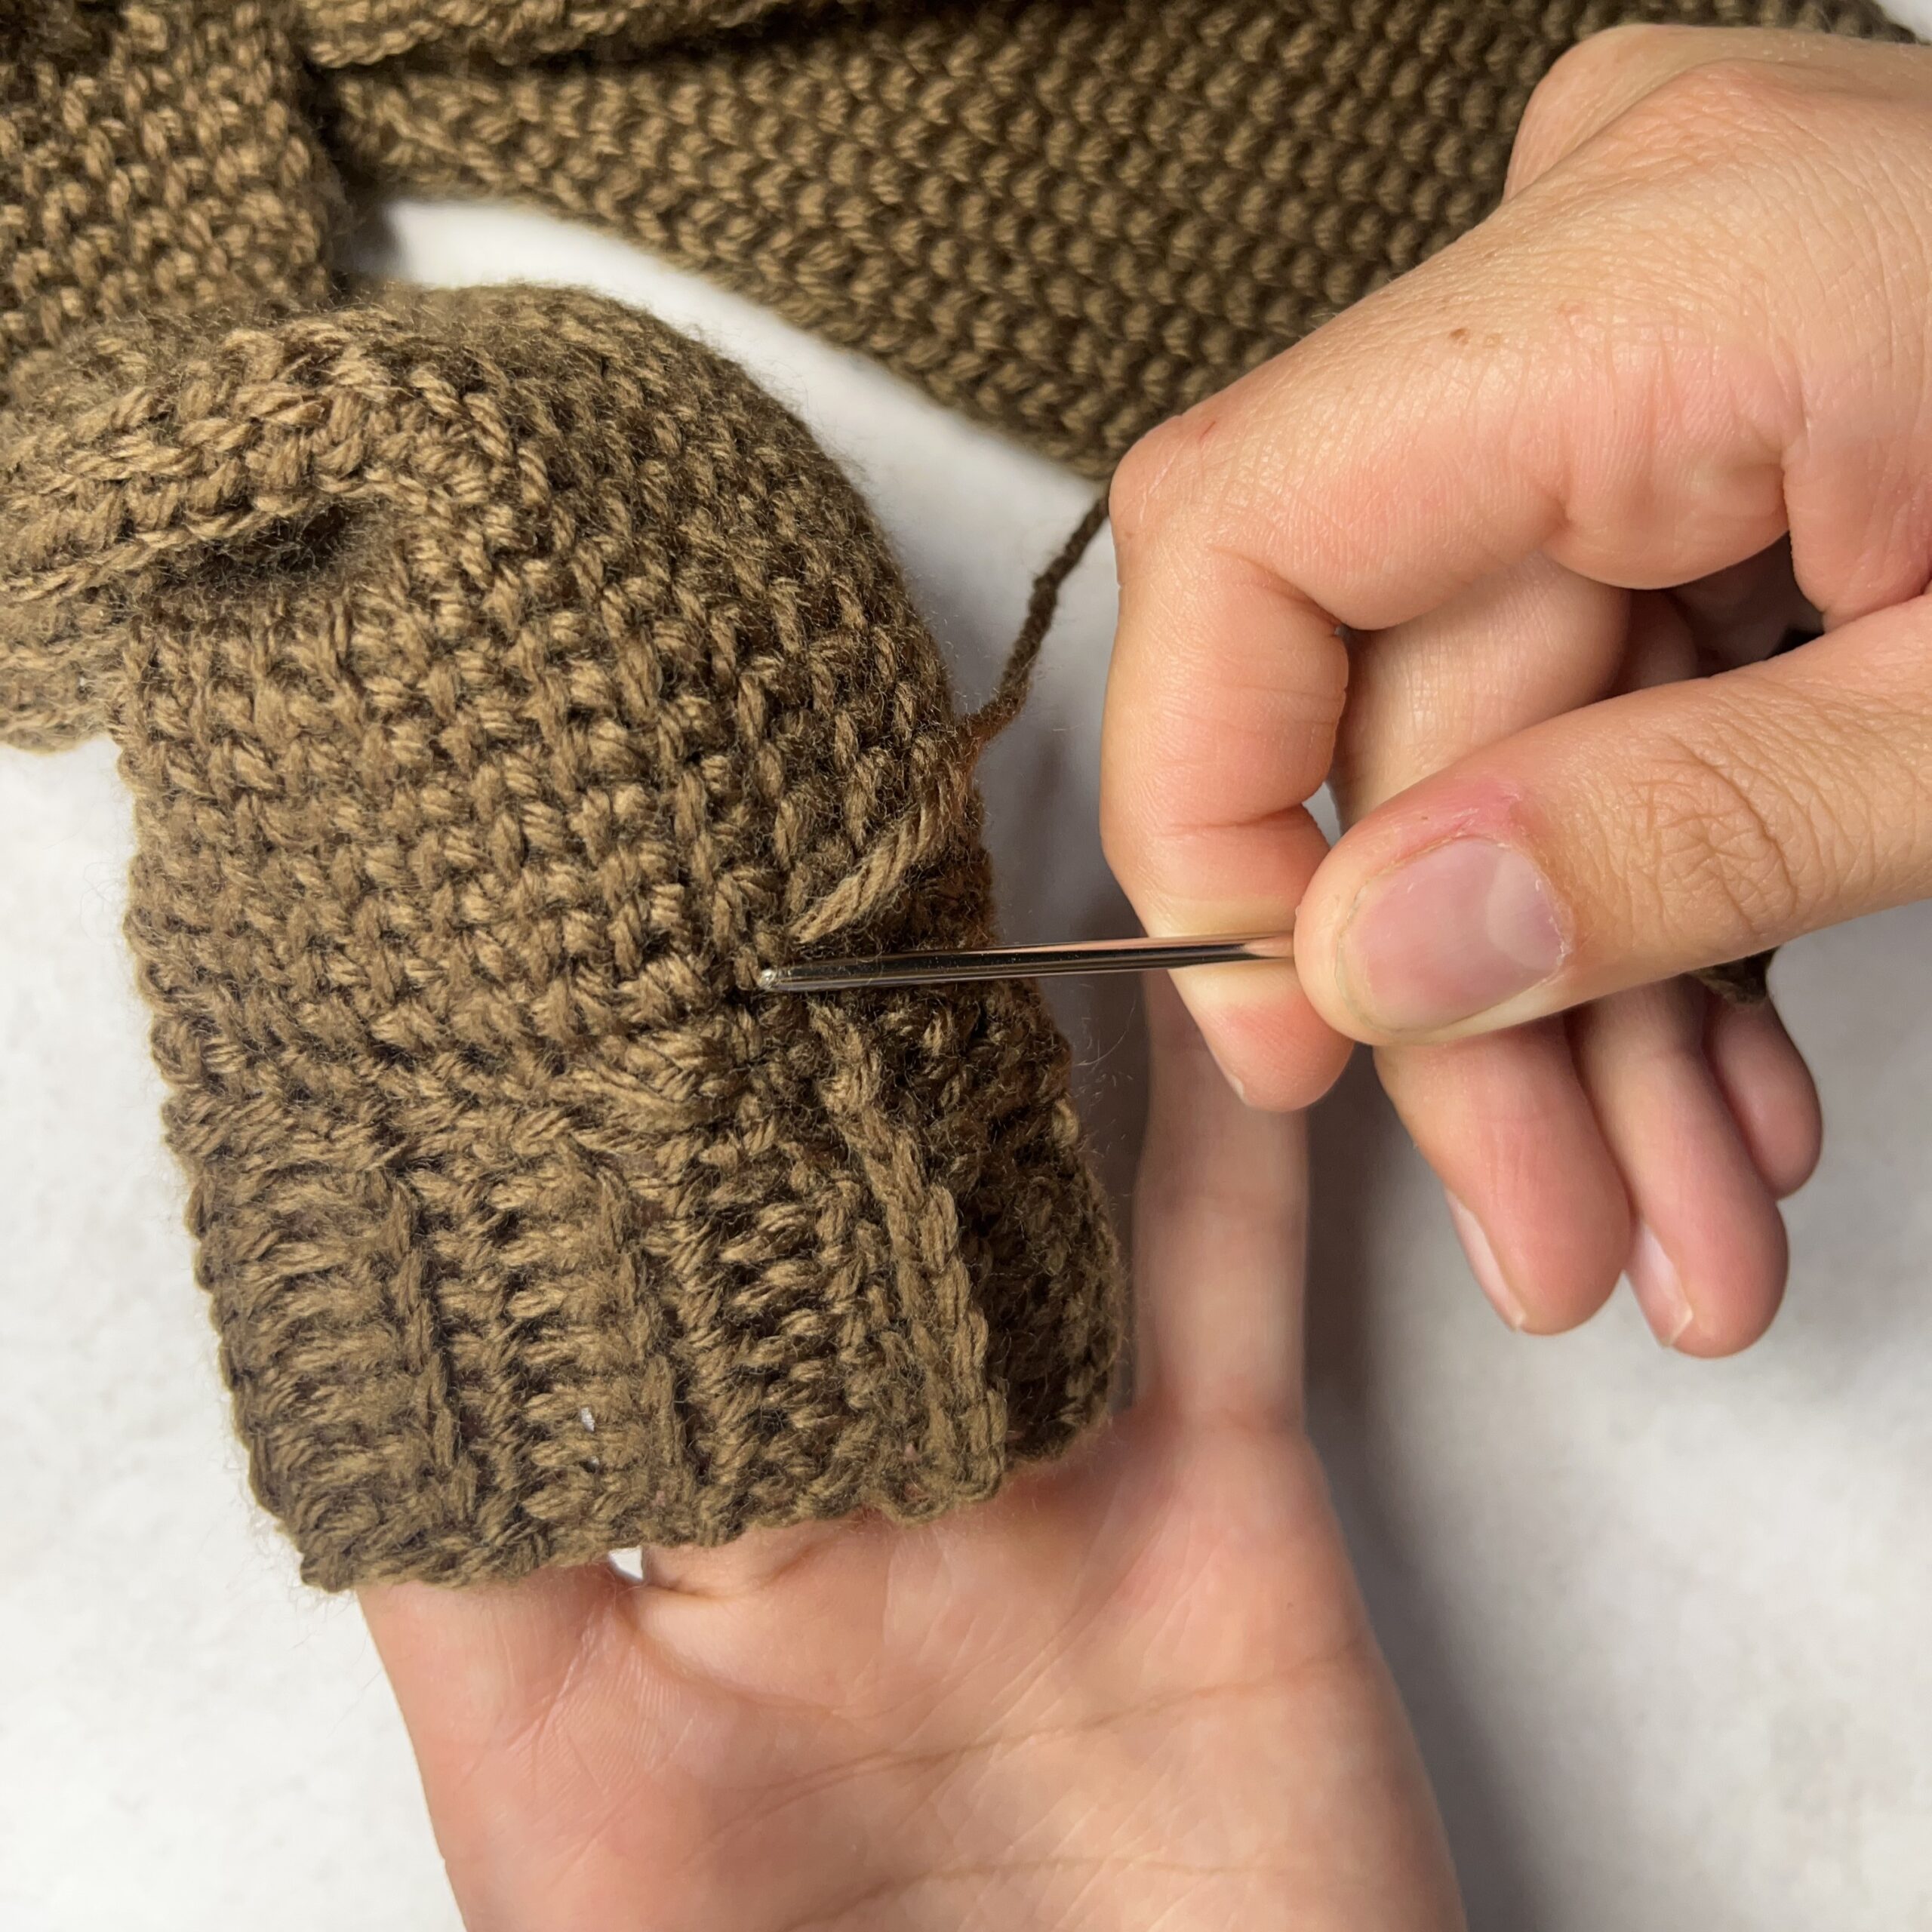
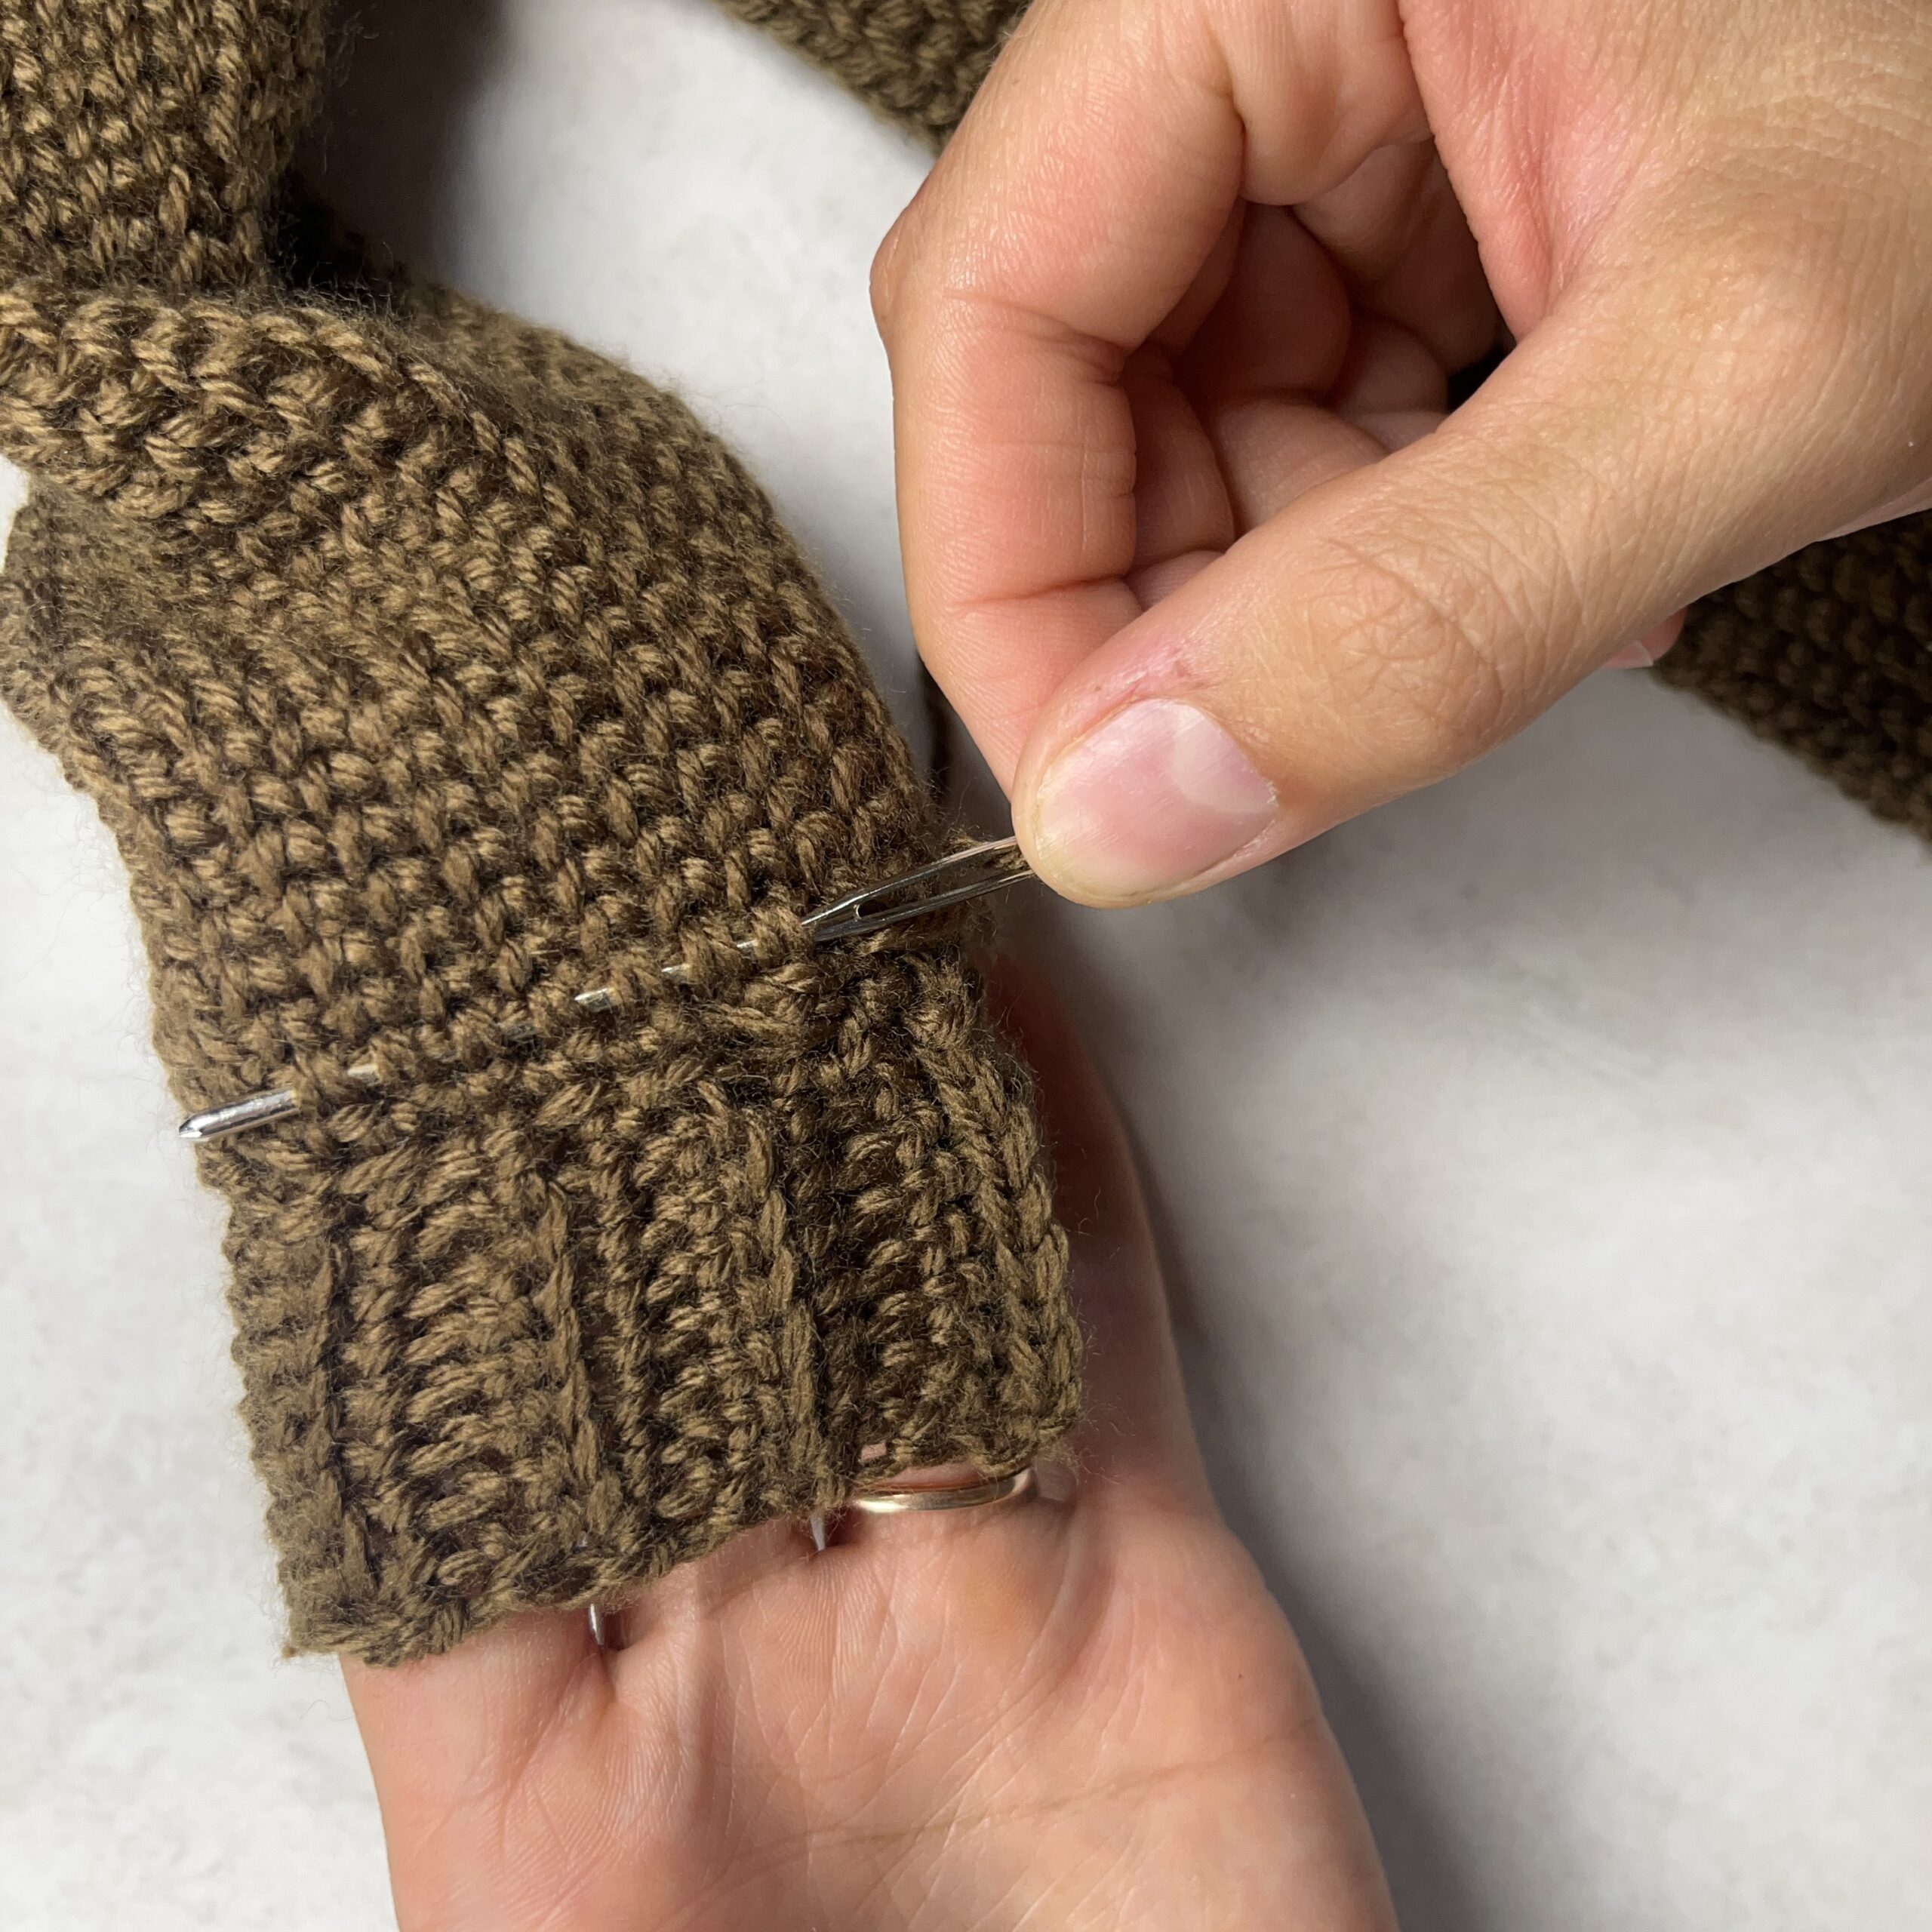
Now If you are like me and are a visual person... right now you probably are staring at your screen saying... WHAT? For you Visual people I have a Youtube Video just for you! It goes over all the things in this blog post, and it even has our bonus tip at the end. I will link that video here.
Bonus Tip!
Disclaimer:
As a general rule this tip works well with any yarn that has multiple strands to it. Unfortunately it does not really work with blanket yarns and super chunky types of yarns that are mostly fluff. Because of this its not great for amigurumi made from chenille or blanket yarn. If you have a yarn with multiple strands though this tip should work for you.
The tip
So this tip is literally one I use for almost every project! If you have tried everything to keep your yarn ends in, and have done all the steps as well as possible, there can still be times where those pesky ends will pop out. Some Yarns and Some projects just seem to always pop out. But there is a solution!
This tip is called "Felting in your ends". This technique is also perfect for those times when you really just don't have a long enough tail to weave in well. Even those short ends can be held in place using this tip.
You may be asking yourself... What is felting? Or you may have heard of felting before. But I will explain, basically felting is a process where a barbed needle is repeatedly stabbed into a fiber. As the needle is poked into the fiber is does really really tiny micro tears, and it tangles all those tears together.
How to
So how does this work? First you will need some felting needles, which you might already have, but if you don't I will link the ones I like here. This set comes with the needles and a Felting Pad which is pretty much a no brainer in my opinion, it is extremely hard to felt something without one
Felting Needle Link
(This link is an affiliate link, if you use this link I will make a small Commission. Thank you!)
Once you have your felting needles you can weave your ends like normal. Then using a felting pad you lay your crochet down on the pad, you locate the end that you are trying to hook down. Then you just repeatedly stab that end over and over with the felting needle. You can stab that end into a space between stitches to prevent it from tangling and felting the surface of your work. I will place a photo of what I mean below. If this isn't making much sense do not worry! I made a YouTube video that explains felting in ends I will link that here...
Crochet Yarn Ends Now Stuck for Good!
I hope this Post has helped you. I remember when I was first learning to crochet I was so frustrated by trying to figure out how to properly weave in my ends. If some of this didn't make sense please do go watch the videos I linked in this BLOG. There are also other videos on my YouTube channel to help you learn to crochet the absolute best you can! I would love to keep making videos and Blog posts, so if this helped you then Join my Email List, where I send out Updates on new Pattern tutorials, and crochet tips!
Crochet for the Holiday!
Join my Email List!
New Free Blog Patterns, Crochet Tips, and Color Grid Designer Updates!